The holiday season is for joy, celebration, and a bit of sparkle! And one of the easiest ways to get into that festive spirit is by giving your nails a seasonal makeover. If you’re a beginner in search of Christmas nail designs for beginners, then look no further. This post will explore a variety of different easy nail art ideas that will give your nails that festive pop.
1. Classic Red and Green

You can’t go wrong with Christmas colors! Just classic red and green. Simple and great for beginners, this look requires fewer tools than other intricate nail designs.
What You’ll Need:
Red nail polish
Green nail polish
Top coat
Optional: Nail tape
How To Achieve It:
Apply a Base Coat: Apply a transparent base coat to protect your nails.
Paint Your Nails: Use one color on every other nail, and make sure to add an extra coat for opacity.
Accent Nails: On one or two accent nails (or every other nail) paint the opposite color, either red or green, depending on which color you started with.
Optional Nail Tape: If you want to be a little extra (like me), add nail tape on and paint diagonal lines across that nail then remove the tape while the polish is still wet.
Top Coat to Finish: Finish off with a top coat for shine and durability.
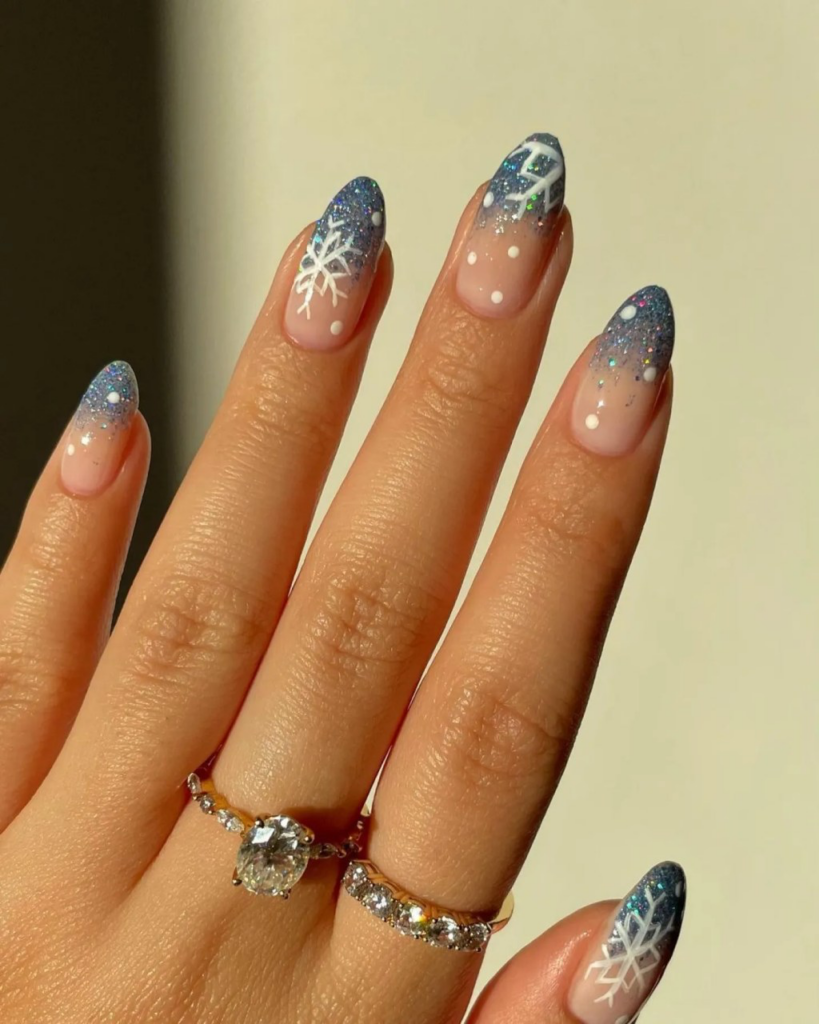
2. Snowflakes and Stars

This design screams winter and is pretty easy to replicate, even for a beginner!
What You’ll Need:
White nail polish
Light blue or light gray polish
Nail art brush or a toothpick
Top coat
How To Achieve It:
Base Coat: Put on a clear base coat.
Base Color: Paint your nails with either light blue or gray polish.
Snowflakes: With the help of a nail art brush, or even a toothpick, dip into white polish and create an easy snowflake (it doesn’t have to be intricate or complicated). Then make a star shape, and add a few lines coming out.
Add Stars: Using the same white polish, add dots or x shaped lines to resemble stars!
Top Coat: Finish with top coat to lock in your design and give it that extra shine.
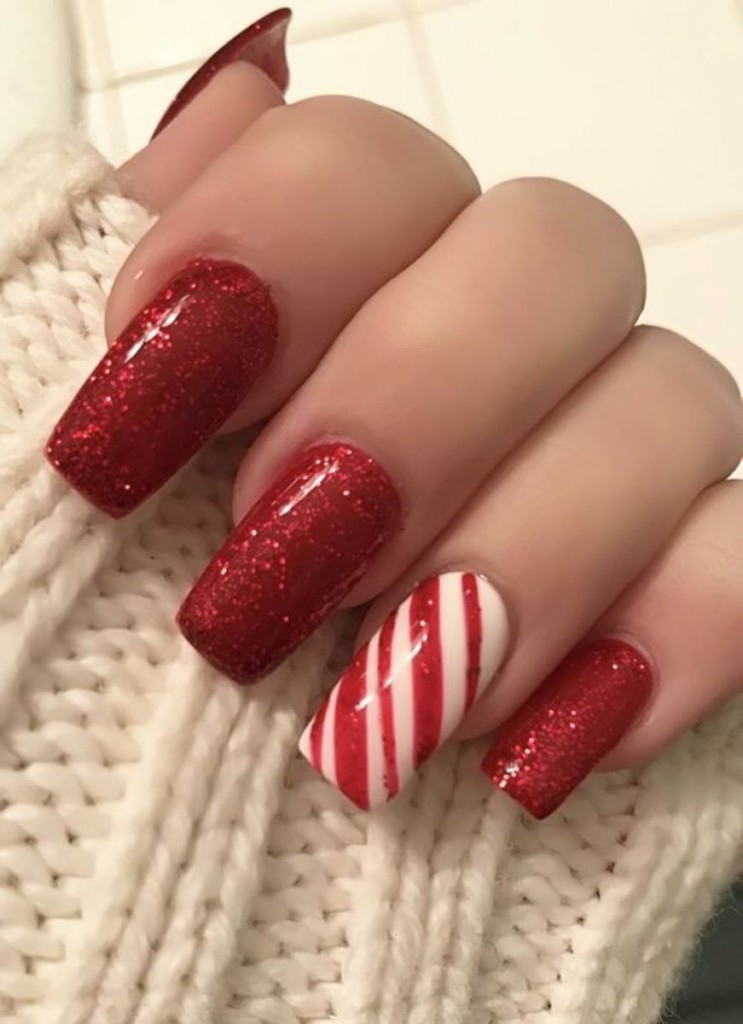
3. Candy Cane Stripes

Candy canes are one of the most loved sweets during the holidays and they can easily be replicated into an adorable nail design.
What You’ll Need
Red nail polish
White nail polish
Nail striping brush or a thin paintbrush
Top coat
How to Achieve It:
Base Coat: Apply a base with no color.
Red Base: Apply red polish.
White Stripes: Once the polish dries, take the striping brush and diagonally paint white stripes across each nail.
Alternate Design: If you want, you can also do the opposite with the base colors, applying a white base with stripes of red.
Top Coat: Seal this with a top coat.
4. Christmas Tree Nail Art

Painting Christmas trees on your nails is so fun and festive! This Christmas tree design is pretty simple:
What You’ll Need
Green nail polish
Brown nail polish
Gold or yellow polish
Top coat
How To Achieve It:
Base Coat: Apply a clear base coat.
Base Color: Choose a color for your nails, a nude or light color.
Trees: On each nail, draw a triangle shape using a green polish. Start from the tip and go downwards, making the base wider.
Adding Trunk: Paint on a little rectangle at the bottom for the trunk using brown polish.
Decorate: Dot on small yellow or gold dots representing ornaments.
Top Coat: Finish with a top coat to seal your design.
5. Glitter Gradient

Glitter Gradient: If you love sparkle, this is great nail design idea. Simple, elegant, and easy for a beginner.
What You’ll Need:
Clear base coat
Any nail polish color of your choice: red, green, white, cream, or gold ( the image above uses a cream base color)
Glitter nail polish
Top coat
How to Achieve It:
Base Coat: Apply a clear base coat on the nails.
Base Color: Paint the nails with a color of your choice.
Apply Glitter: Once the base color has dried, take the glitter polish and apply it from the tip of the nail going upwards. You can build it up to your liking.
Top Coat Seal: Apply a top coat at the end to seal in the glitter and add extra shine for flair.
6. Simple Dots and Lines

This is a very versatile design that you can tailor to your style.
What You’ll Need:
Nail polish in holiday colors: red, green, and gold (or a glittery variation of red and green)
Dotting tool or a toothpick
Top coat
How to Achieve The Look:
Base Coat: Put on a clear base coat.
Choose Base Color: Paint your nails one color.
Dots: Using a dotting tool or a toothpick, dip into another color and dot along cuticles or the end of your nails.
Top Coat: Then, finalize it with a top coat.
7. Reindeer Nails

Time to get playful with this adorable reindeer nail art!
What You’ll Need:
Brown nail polish
White nail polish
Black nail polish
Red nail polish (for Rudolph)
How to Achieve the Look:
Base Coat: Start with a clear base coat.
Base Color: Paint your nails with brown polish.
Add Faces: On a few nails, use white polish to create a half-moon shape near the cuticle to represent the face. Use black polish to make the eyes and a small red dot for the nose.
Antlers: With brown polish, use a fine brush to create simple antlers above the face.
Top Coat: Finish off with a top coat.
With these simple Christmas nail designs, you can easily get into the holiday spirit without having advanced nail art skills. The way to lovely nails is just patience and practice, not afraid to experiment with colors and techniques to make them your own. From classic colors to fun patterns, to even adding a touch of sparkle-this design should be for everyone. Happy decorating, and enjoy showing off your festive nails this holiday!

